Mold Removal for a Bathroom Remodel(Complete Guide)
Have you started a bathroom remodel project just to find tons of mold in the process? Not to worry! In most cases, mold can be dealt with quickly and following just a few steps. Here are the steps you need to follow when removing mold:
- Identify the Mold
- Take Safety Precautions
- Start the Removal Process
- Cleanup the Area
- Begin Repairs and Remodel

Although there are only five steps, the mold removal process can require a certain level of skill. So if you’re not up for the challenge, contacting a professional could be your best move. But if you are, keep reading!
Mold can be found all over a bathroom in areas like grout lines, drywall, under cabinets, and on any fabric inside the bathroom. Mold should always be taken seriously because it’s a serious health hazard.
Mold releases microscopic spores that can cause allergic reactions, runny noses, and sneezing, as well as irritation to your eyes. These spores also cause irritating, and even harmful odors to be released into the air.
That said, you’ll need to exercise caution all throughout the mold removal process. If you’re ready to get started on reclaiming your space, here’s our complete guide.

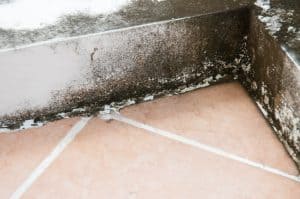
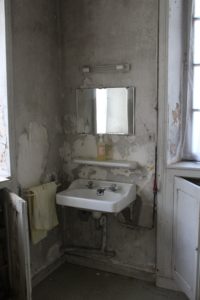
bathroom covered in mold and mildew
Mold Removal Steps
1. How to Identify Mold.
Mold can be found all over the place. It is a type of fungus that grows from tiny spores, that float in the air. Wherever you find these spores, you will also likely find mold.
Spores thrive in areas with plentiful moisture and a temperature that is somewhere between 40 and 100 degrees. Since bathrooms match these conditions perfectly, they are a very normal place to find mold.
The easiest type of mold to notice is mildew. Mildew usually starts as tiny black dots, but can quickly grow into large colonies of these spores.
Mildew is typically the black areas that you see growing in grout lines, damp walls, or any other locations where moisture is abundantly present.
The unfortunate part about mildew is that its surface can also just be mistaken for as a dirty surface. To test for mildew, simply dab the area with household bleach. If after a few minutes the area remains dark, you simply have dirt. However, if it lightens, you have mildew growing in your bathroom and you will need to take the following mold removal steps.
If you do not see any of these black spores, yet you can still smell that musty odor that mold produces, you will need to check every space in and underneath your bathroom. Mold is not only on the surface but can also grow underneath surfaces. You will need to check under any carpeting, cabinets, behind damp walls, inside crawl spaces, and under any wet floors.
If after doing your search, you have identified the culprit to your musty smell, continue onto the next step to start getting rid of the mold. It is important to do this right away, as we mentioned above how dangerous mold can be for your health.
2. Remove Large Infestations
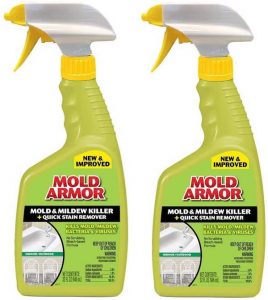
For this step, there are many different levels of cleanup that you will need to do, depending on how bad your mold infestation is. If you just have surface mold, like the mildew we talked about above, then you will need to scrub it away, using a one to eight ratio of bleach and water. You can also use a mold removal cleaner.
Mold Removal CleanerThis cleaning solution will help you not only clean the mold off the surface but will also kill the mold as the bleach would have dried it out. However, in most cases, mold grows for a much longer time than you may have though. In most scenarios, mold has been growing for weeks, or even months, before you see it. And it likes to grow in places you cannot even see.
It is best to always test certain areas of your bathroom where a musty smell is emitting from, the floor feels mushy, or if the walls themselves seem to be falling apart. These are all signs that too much water has been soaked up in that area, creating a prime place for mold to grow. If you search these areas and find any amount of concentrated mold, or black mold of any kind, in an area larger than a few square feet, there are special precautions you will need to take.
These precautions are not only required to protect yourself from inhaling the fumes the spores give off or swallowing the spores themselves, but they are also intended to keep the rest of your property from getting contaminated by this infectious material. In addition, the precautions also protect you from breathing in the cleaning supplies, or the material you are having to remove from the bathroom.
These Mold Removal Guide precautions are the following:

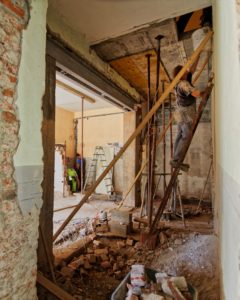
Full bathroom remodel for mold removal
- Wear older clothes and shoes that you can wash or don’t mind tossing out after you finish the cleanup process.
- Wear industry-grade respirators, as well as professional gloves and eye covers.
- Set a fan or an in-window ventilation unit in the room while working. Throw either out when you have finished cleaning, as the spores are nearly impossible to clean off. Also, tape plywood or cardboard around the window openings if you chose the ventilation, so the spores can’t blow back in.
- Seal off the room you are working in, to contain the spores.
- Wrap and tape moldy carpeting in 6-mil plastic, and double-bag mold-infested debris in garbage bags for disposal.
- To control airborne spores, moisten moldy areas with a sprayer while you work.
- Turn off your heating and air conditioning, as well as cover ducts and doors, to contain spores.
- and Keep your wet/dry vacuum outside when you vacuum.
3. Begin the Removal
Moisture damage and large infestations of mold go better than peanut butter and jelly. If you have one, you most likely have the other. But do not worry, there are steps you can take to rid yourself of these infestations, as long as you are wearing your protective gear and have sealed off the area.
If you have found mold in, or under, your carpet, you will need to pull it out. The easiest way to do so is to cut the carpet, and its pad, into six by eight squares, with a utility knife. While rolling the carpet up, spray the carpet with water to keep the spores under control. Once you have all the carpet pieces rolled up, bag them in six-mil plastic and tape them shut.
When it comes to removing walls with mold, you will first need to pry off the baseboard and trim. Then, use a screwdriver to open up an area in the wall where there is the most moisture. From there, you will need to pull that drywall off of the studs. If there is only a section of the wall damaged, using your utility knife, scribe out the area of drywall you need to remove. This will make the repair step much easier.
After pulling off the contaminated drywall, you will need to once again spray everything down to contain the mold from moving around freely. In most cases, you will also need to do this with any insulation that was behind the infected wall. In addition, check the wood in that area as well for rot. If you find any, you will need to replace this immediately as it is structurally unsound for your home. Once all contaminated materials have been pulled out, double bag them in a large trash bag, preferably the black garage bags.
4. Cleanup the Area
Now that all the large contaminated pieces have been removed safely, you can start cleaning the space up. You begin this process by vacuuming the entire space with a wet-dry vacuum, but as we mentioned above, keep this vacuum located outside of the home. Once the vacuuming has been completed, you will need to toss out the filter and clean inside the tank with the bleach water we mentioned above (a one to eight ratio). You can also contact local house cleaning companies to see if any of them have experience with mold removal.
With all the dust and chucks vacuumed out, you will now need to scrub the area down. Scrub any and all surfaces where mold could have and did touch. For this cleaning, use 1 quart of water and half a cup of bleach.
Using a soft brush, work the solution into the surfaces until all appearances of mold disappear. After scrubbing, allow the solution to be soaked up and dry into the area. This will help ensure nothing continues to grow where you cannot see it. And lastly, wipe the area off, but do not rinse. For concrete, scrub with TSP or automatic dishwasher detergent.
Lastly, you will need to set out dehumidifiers and new fans to help the area dry out for at least three days. During these next few days, go in and check for any new mold growth. If any appears again, redo the removal and cleanup steps to our Mold Removal Guide. When you are sure the mold has been completely eliminated, seal all wood areas with a pigmented shellac or oil-based primer, for an extra precaution.
5. Begin Repairs
Now that everything has been cleaned up and cleared of the hazardous mold, you can get back to your bathroom remodel as you have completed our Mold Removal Guide. However, if after reading this, you decide there is too much work for you to do yourself, you can always contact a local bathroom remodeling business to complete this task for yourself. Otherwise, get your gloves and goggles back on and get to work on remodeling your new and improved bathroom! Our only recommendation is that when you start painting, use latex paint that contains mildewcide to help stop future mold growth.
Summing It Up
Almost every home gets infected by the hazardous mold at some point in its life. The trick to mold remediation is to get them before they spread too far and begin harming your, and your family’s, health. Our Mold Removal Guide is quite simple, as it follows every precaution you need to take to get the job done safely.
The steps go as follows:
- Identify the Mold
- Take Precautions
- Start the Removal
- Cleanup the Area
- Begin Repairs and Remodel
Without following these steps exactly, you may not rid yourself of the nasty invader. The process if tough, but you can do it. However, if you feel the job is best left to the professionals, simply call in a local bathroom remodeling business, and they will get your place bath to a safe and healthy environment. It’s also important to keep a property safe and clean if you area property manager or own rent houses. A mold filled property could be a liability if left untreated.


