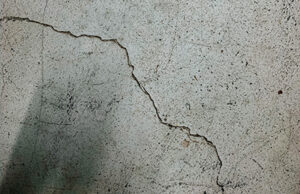
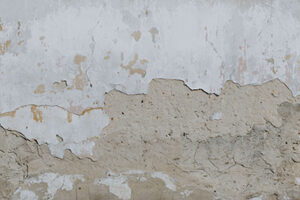
How to Repair Cracks In Garage Ceiling
Cracks in your garage ceiling can be unsightly but they’re not necessarily a problem. However, you may want to repair them for aesthetic appeal or functionality.
If the cracks are small enough that you don’t see any light coming through them or if they’re located high up on the ceiling, you can paint over them to make them less noticeable. If there is insulation inside the crack, remove it if possible, then fill the crack with roofing cement or caulk. In the event that moisture is causing the cracks, it needs to be addressed for them to go away.
So, how can you repair cracks in the garage ceiling? While some people may just patch or paint over them, our six tips to completely repair cracks in a garage ceiling are to:
- Patching
- Stripping
- Painting
- Sanding
- Applying Primer
- Final Painting
If you own a home with a garage, part of your living space probably contains the garage itself. If this is the case, then every so often you may need to repair some cracks in your garage ceiling.
While some people patch over them and forget about them, others want to take the time to fix these cracks so that they don’t grow larger. Either way, if you want to fix them the right way it’s important to keep these steps in mind.
Garage Ceiling Cracks
Excessive cracking of the interior finish of a building is evidence that insufficient allowance has been made for settlement. Some cracks are inevitable, but they should not be confused with those which indicate structural movement or settlement.
In areas of cold climate, where building units have low moisture content and considerable strength, shrinkage will cause only slight cracks. These are usually horizontal and run parallel to the direction of shrinkage.
Cracks caused by structural movement or settlement often follow a zigzag course and may be slightly V-shaped with the V pointing toward the weakest part of the building. Here are some tips for fixing the cracks in your garage ceiling:
1. Patching
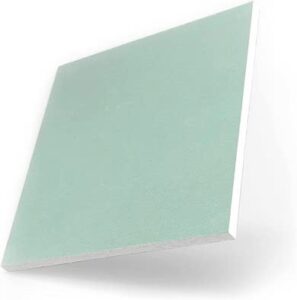
The first step is to patch over any cracks that are present. This means putting a new piece of drywall onto the ceiling so that everything is smooth once again.
2. Stripping
If your garage has surface rust, then chances are you’ll need to strip it away before you can put fresh paint onto the ceiling. This means using a combination of water and acid to get rid of everything rust-related.
3. Painting
Once everything is stripped down you can go ahead and start putting on new paint. Make sure that you do this as evenly as possible to ensure that the ceiling looks nice and uniform once everything is said and done.
4. Sanding
If you notice uneven patches, then it might be a good idea to smooth them out using sandpaper. When you do this, make sure that you consistently switch back and forth between coarse and fine grades to get rid of any low spots that might be present.
5. Applying Primer
Then, once you’re done sanding the entire surface of the ceiling, it’s important to apply a primer to get rid of any remaining issues with the drywall itself.
6. Final Painting
The final step is simply to paint over everything you did above so that it all looks nice and neat. By doing this, you’ll ensure that the ceiling of your garage looks great and that any cracks which might have been present are now gone.
Garage ceilings can take a beating from cars, bikes, and even lawnmowers. Sometimes the damage is so severe that you might need to tear down part of your ceiling and replace it.
Signs to Notice Repair Requirement
You have decided to repair the cracks in your concrete garage ceiling or you need to do so because of routine maintenance. You are wondering what you should look for when doing so. The following list will help you identify possible problems that may be occurring in your garage.
Knowing these problems ahead of time can save you time and money in the long run, by allowing you to prepare for the work ahead. If you haven’t done any major renovations around your garage in several years.
Here are five things you should look for before you make a decision:
1. Stains or Watermarks On Your Ceiling
These are signs of moisture intrusion inside the garage, which often stems from cracks in the foundation above the garage.
A crack in a foundation wall can allow more moisture into your garage than is intended, leading to mildew formation and potential floor joist deterioration due to rot.
Look for large blisters or bubbles that appear to contain water. If you find any, you might have a damaged ceiling. Whether this is your fault or that of the previous owner depends on what caused the leak and if it’s been fixed.
2. Cracks in The Wall or Floor of Your Garage
Over time, expansion and contraction of concrete can lead to cracks forming on either side of a wall separating your garage from the foundation. These are often very small at first, but over time will expand and become unsightly.
If your leaks are in the foundation, this is very commonplace to find them. If it’s bumpy, it might not have been repaired properly. Cracks in your garage ceiling are either easy or hard to repair depending on what caused them.
It’s a two-step process, so you have to be sure the repairs work before going on.
3. Cracks in Your Garage Floor
If you have cracks in your garage floor, chances are either there has been some settling of the building or water intrusion from above has damaged the concrete. Not only can these cause aesthetic problems, but they may also lead to dangerous driving conditions over time.
4. Your Home’s Frading Slopes Away From the Foundation
If your home is not on solid ground, water may build up around the foundation of your garage and lead to corrosion or potentially even collapse of concrete flooring or walls.
Look for places where the soil has built up against the side of your garage, under modular racks, or any other signs of water pooling.
5. Spalling Around the Garage Door
If you see flaking and peeling paint on your garage, this is usually an indicator that there is too much moisture inside the structure (due to poor ventilation). Too much moisture or water accumulation can often cause corrosion and rust on your garage door, creating an additional problem. However, the good news is that this can be prevented with proper ventilation, regular maintenance, and, if necessary, impact garage door replacements and installations.
As water collects in areas under insulation or against walls, it leads to softening of the structure and subsequent flaking.
Repairing Cracks in Garage Ceilings
To repair cracks in your garage ceiling, start by locating the source of the problem. In some cases, it’s as simple as just caulking them or painting over them with elastomeric paint.
If it’s a bigger problem, however, you might need to get creative with how you treat it using patching compounds and fillers.
If the crack is purely cosmetic and doesn’t go all the way through your ceiling, you can just use elastomeric paint. These paints won’t allow water through them and work well on cracks, though you may need to paint over the spot 2-3 times for this to work.
You can get elastomeric paints at home improvement stores like Lowes or Home Depot for between $10-$20 per gallon depending on the brand and type of paint.
The more extensive damage you have, however, the harder it will be to repair. There are several ways you can fix cracks in your garage ceiling, though they all involve some sort of filler like plaster, patching compound, or spray foam.
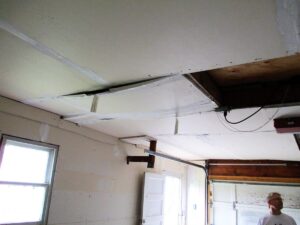 Garage Ceiling Crack Repairs
Here are a few easy ways to repair cracks in your garage ceiling:
Spray Foam
If you have very large cracks (more than 1/8″ wide), use a quality spray foam insulation kit. This type of product is more expensive than other fillers but well worth the cost.
You can use it to seal up cracks, holes, and even gaps in your walls. The insulation will help prevent insect infestations as well by blocking them from entering your garage.
Patch Compound or Filler
If your crack is too large for elastomeric paint, you should patch it with a patching compound or a filler designed specifically for drywall.
Patch Compound
If you plan on painting your ceiling, use a patching compound instead of spackling because the former dries faster. It will require sanding to smooth out but can be painted almost immediately after applying.
The downside is that they don’t stick to old paint so you have to scrape off the area around it before applying.
Drywall filler patching compound can be hard to work with because it gets soft quickly. It’s is also more expensive than drywall filler, which costs between $4-$7 per tube depending on where you buy it. This type of filler dries quickly as well so you can paint over it almost immediately.
Warnings Before Repairing a Cracked Garage Ceiling
A lot of homeowners are not aware that there are specific steps that should be strictly followed when it comes to repairing a cracked garage ceiling. If these tips are not considered, the homeowner might end up damaging the ceiling even more.
Several factors lead to cracks in ceilings including moving heavy items or dropping heating elements directly on the surface.
If these anchors are not used or installed incorrectly, it can lead to water damage that will eventually cause the ceiling to crack.
Steps to Safely Repair a Cracked Garage Ceiling
So what are the steps in repairing a cracked garage ceiling?
First of all, make sure you get rid of any items you have on top of the ceiling. These heavy appliances might be the reason why there are cracks on the ceiling, so it is best to get them out of your way. You can place these items on counters around the garage or even in other rooms.
Once all the appliances are moved away from the area, you will need to patch up any holes that may be found on top of the ceiling. A drywall filler comes very handy when it comes to filling these holes.
Once the holes are filled, you will need to ensure that any water on top of the ceiling is removed. Start by using a wet-dry vacuum cleaner and suck up all the liquid. Once this step has been completed, you can now start drying out the area using a heater or some fans.
In Conclusion
Be sure to monitor the area for any signs of new cracks. If you notice there are new cracks on top of the ceiling, refrain from using anchors. Instead, purchase some all-purpose adhesive that can be easily applied in repairing small holes in ceilings.
Additionally, if your roof is also damaged, it might be best to hire a professional roofing contractor to repair your roof. The last thing you want is for the ceiling of your garage to be damaged because of a poorly repaired roof.
The steps mentioned above are crucial when it comes to repairing cracks on ceilings. If you do not follow these steps, there is no doubt that you will end up making things worse instead of better.

