Water damage can be time-consuming to clean up and is destructive. It can cause the wood to become discolored, warped, and weakened and can be susceptible to rotting and mold growth. Waterproofing should be looked at as a proactive approach to protecting your investment–and your family–from leaks, damage, and harmful mold. The kitchen is one room in your home that gets a lot of water activity–some of it unwanted. Spills, steam vapor, pipe leaks, overflowing sinks, and a myriad of other issues can wreak havoc on your kitchen at any time.
How do you waterproof kitchen cabinets? If you’re waterproofing your kitchen cabinets DIY-style, you have a number of options available to you.
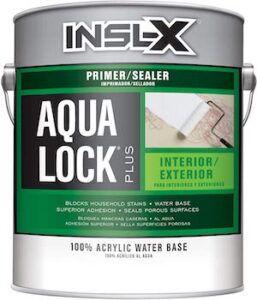
- Primer, Paint and a clear coat of Varnish on Wood Surfaces
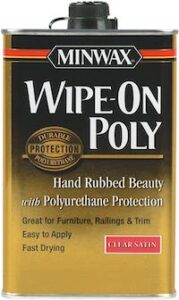
- Polyurethane Sealer to Coat Cabinets
- Polyurethane Sealer Caulk for Edges
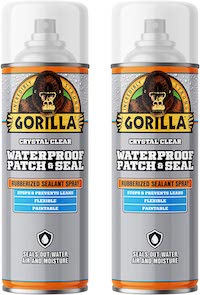
- Rubber Spray Coating
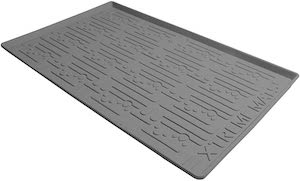
- Use under-sink mats
Primer, Paint and a clear coat of Varnish on Wood Surfaces
Refinishing areas made of wood can prevent water damage–and it doesn’t break the bank. Sand the surface to where the wood will hold the primer paint, add the primer and a good coat of paint, then add a clear coat of varnish to seal it. If you’re waterproofing wood cabinets, use linseed or Tung oil, varnish, or lacquer–or finish and waterproof it with a stain-sealant combo.
Polyurethane Sealer on the Cabinets
Protect your wood cabinets from water, household chemicals and food stains with this high-quality oil based polyurethane. It provides the hand rubbed look of natural oils while protecting against water that can damage it over time. Applying a polyurethane sealer will help fend off water and the damage that it can do to your cabinets.
Polyurethane Sealer Caulk around Fixtures and Sinks
Seal up any cracks and crevices where water can escape with a high-quality polyurethane sealer. Polyurethane sealers are amazing because they will not crack or peel like other materials do over time. This makes them great for long term use. Utilizing polyurethane sealer around leaky fixtures or around you sink can also help prevent damage to your cabinets.
Rubber Spray Coating
You can stop leaks in your kitchen with a spray-on rubber coating. This waterproof coating will help protect cabinets and keep water damage at bay, so you don’t have any more worries about damaging your beautiful kitchen. A rubber spray coating is a durable and heat-resistant option. A product with quick curing time will make application process much simpler. You can use the rubber spray coating around your sink and fixtures to add a layer of protection from water.
Use Under-Sink Mats
A leaky under-sink cabinet can be fixed with water resistant floor mats. The sturdy design of these products will keep your base from getting wet and damaged, while also being flexible enough for small openings or backfilled when installing them in larger cabinets accessable only by opening doors at the top (for example). These rubberized pieces are easy to clean; usually made out waterproof rubber material. This is a great way to protect cabinets from damage caused by plumbing leaks, chemical & product spills. An under-sink mat can fit easily beneath the sink and be removed quickly when you need it for cleaning!
Areas You’ll Want to Waterproof
Under the sink. Check areas surrounding the pipes for moisture or water stains. Fill any holes with caulk. Check the floor beneath the plumbing for soft spots or stains, which are sure signs of leaks that need your immediate attention.
If the pipe under your sink cracks, the first thing that’ll get damaged is the inside of the cabinets under the sink. One way to prevent this is with stick-on vinyl tile and caulk. Look for tutorials on YouTube on how to use 12×12 vinyl tiles with sticker backing to line the bottom of the cabinet. It’s a bit labor-intensive, but it’s a low-cost method to help with small leaks.
Another simple DIY way to protect the inside of your kitchen cabinets against the damaging effects of moisture is to install rubber mats, plastic trays, or waterproof material that absorbs moisture.
Around the sink. Inspect the seals around the sink for cracks or looseness and replace them if necessary to prevent water from seeping into your cabinets through the gaps in the seals. If there are missing or broken countertop tiles, assess whether or not it’s being caused by a steady leak around the sink.
Faucet and pipes. Replacing the plumbing under your sink is a low-cost preventative measure you can take to fend off water damage, especially when you consider the cost and hassle of replacing damaged cabinets.
Backsplash. “Splash” is in the word “backsplash” for a good reason–to protect the wall between a kitchen counter-top and the upper cabinets from the splashing of water from a faucet and grease from a pan. A backsplash is more function than visual appeal, even though they’ve become a way for homeowners to express themselves.
The wall behind the backsplash is susceptible to mold and mildew if there are cracks in the caulking or grout because water will get in. It’s a good idea to periodically inspect the caulking under the sink and around the backsplash. If there are cracks, a $5 tube of caulk will mitigate the problem before you experience water damage, which can be costly to repair.
Walls and other vulnerable areas. Look for polyurethane products that provide a complete waterproofing solution for wet areas, which may include walls or other vertical surfaces.
Do I Have a Leak?
If you currently have a leak, it’s important to act quickly, whether it’s large or small, because the potential for long-term damage is high.
How to Determine if You Have a Leak:
Examine the areas around plumbing pipes and hoses for signs of moisture. Then look under sink pipes and hoses for loose connections. See if there is a musty odor under your sink. Finally, check cabinets, floors, and walls for dark spots or areas of discoloration.
If you have a leak in your kitchen, it could be costing you an extra 10 percent on your water bills. It’s also a huge waste of water–the average household leaks nearly 10,000 gallons of water per year–or the amount of water it takes to wash 300 loads of laundry. (Source: epa.gov)
Many household leaks are quick to find and easy to fix. A leak can come from plumbing, moisture from ventilation issues, or even water that splashes on your counter while doing the dishes or washing your hands.
How Do I Find a Leak?
If you suspect a leak, the EPA suggests conducting a 10-minute search of your kitchen in these four places:
Under the sink: Look for pooling water under pipes and rust around joints and edges.
Appliances: Pooling water underneath dishwashers and refrigerators with ice makers can indicate a supply line leak.
Faucet: Listen for drips and tighten aerators or replace fixtures if necessary.
Sprayer: Check that water is spraying smoothly and clean the sprayer openings as needed.
What to Do When You have a Leak
The Nose Knows: A good rule of thumb here is–if it smells wet, it is wet. Although it can be challenging to pinpoint moisture, odors from water damage can be immediately noticeable or might occur sometime after the initial cause. Some odors are directly related to the source of water while others can be an after-effect of bacterial and fungal growth.
Dry the Affected Area: First, you’ll want to make sure that any area of your kitchen that experienced water damage is totally dry. Use air-moving fans, or even a dehumidifier if needed, to dry out any moisture. After you’ve dried up the moisture, you’ll need to deal with any mold that may have grown. Mold is a health concern for your family and your pets.
Get Rid of Mold: Mold begins to die on its own rather quickly when you’ve dried up the moisture. To speed it up, you can scrub the area with hot water and soap or, for surfaces that aren’t easy to clean, you can spray them with white vinegar. The smell isn’t great, but the vinegar will kill bacteria and mold, and evaporates quickly.
Don’t Mask the Odor: Masking the musty smell is tempting and may prevent the unpleasant odor, but if it lingers there may damage you haven’t found yet. Don’t ignore the problem. It won’t go away. Mildew, mold, and water damage will only get worse.
Evaluate the Damage: If you’ve experienced water damage in your kitchen cabinets, you’ll need to determine the extent of the damage and whether the cabinet is structurally sound. If a pipe burst or it’s discolored by high humidity, chances are it’s not. If the cabinet has sustained long-term damage, the plywood may be warped and glue joints may be loose.
Repairing the Water-Damaged Area: After you’ve taken care of the source of the damaging moisture and completely dried out the cabinet, most damage can be repaired with carpenter’s glue, clamps, and screws. If the bracing is weakened or separated, you’ll want to remove the old braces and reset them with new glue and screws or replace them altogether. By removing the old braces, the screws will draw the cabinet together more easily.
Related Questions
Should I use a Leak Detector Detect?
One of the easier proactive ways to prevent water damage is by using a leak detector/sensor that sits inside the base of the kitchen cabinet and sounds an alarm when a leak is detected by the sensor. It’s worth the investment of your time to check plumbing inside and outside your home regularly to save money–and the hassle–of dealing with water damage. If you find a leak, repair it immediately.

How do I Remove Stains from Wood Cabinets?
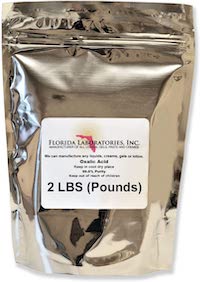
If water has penetrated the wood in your cabinet, there are DIY solutions you can make to lighten the darkened areas. Oxalic acid can be used to remove blackening in oak and other woods. It’s widely used as a wood bleach because it removes stains without removing the natural color of the wood. You’ll need to sand off the finish before applying the acid. Once you’ve sanded the area, you’ll make a saturated solution of oxalic acid crystals and water. You’ll know the solution is saturated when no more crystals will dissolve. Brush the solution onto the affected wood.
Apply it liberally to allow the solution to remain on the surface until the lightness you desire is achieved. When you’re done, dissolve ½ cup of baking soda in a gallon of water and sponge it onto the wood to neutralize the acid, then wash it with clear water. It’ll be ready to refinish when the wood dries.
NOTE: Oxalic acid is toxic and should be used with care. Use eye protection, rubber gloves, and protective clothing when using it and dispose of it according to directions.
Keep your kitchen free of excess moisture, repair small water leaks before they get bigger, and be vigilant about maintenance. Think of waterproofing your kitchen cabinets as an ounce of prevention that’ll provide a pound of cure.

