What You Need to Do Before You Paint a Room
DIY home projects are on the rise as it is typically a money-saving option for most homeowners. Not just that, but they are also a fun way to learn new skills and get a feeling of accomplishment. For many, it’s a good idea to take on simpler home projects, like painting for instance, as it is an easy enough task to learn and complete. However, before you even think about opening your paint bucket, there are several things you must do. Although it may seem tedious, prep work is just as important as painting itself because it will directly influence the quality of the finished product. It can be a pretty painless process once you know the rundown which is exactly why you’re here so let’s get into it!
How do you prep a room for painting? There are several steps you should take to prepare a room for painting. These steps include:
- Measuring the room
- Removing wall decor
- Repair bumps or cracks
- Fill holes
- Remove furniture
- Apply painter’s tape
Once you complete these steps, you are ready to tackle the project ahead of you. Proper preparation is the best way to ensure that you do not run into any problems once you being painting.
Steps To Prepping A Room For Paint
When it comes to prepping a room for painting, there are several steps you must follow. First, let’s do a general summary, and then we will go into more specifics based on what you are needing to know for your project.
- Always start any home project by taking measurements. Measure the length and width of the room you will be painting as well as the height of your ceilings. This information will be necessary when getting supplies and paint.
- Remove everything from your walls including pictures, light coverings, old nails, etc.
- If needed, use a sander to remove large bumps, old wallpaper remnants, and anything else that may cause an uneven base.
- Fill in any large holes with spackle and sand them down once dry.
- If possible, remove all furniture from the room, not only to avoid spilling accidents but to also allow you full access to move around the room.
- Make sure your floor is covered with a drop cloth or an old sheet. You can use newspaper too if you don’t have a drop cloth on hand.
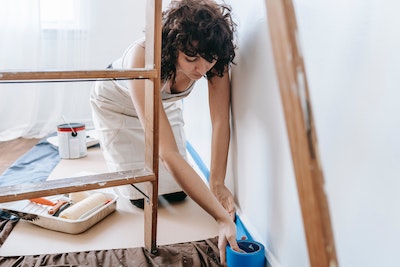
- Apply painter’s tape around windows, doorknobs, sockets, and anywhere else you don’t want the paint to accidentally get on.
Take Measurements
 Before buying paint or supplies for any project, take immediate measurements of the room you will be working with. Measuring the length and width of the walls as well as the height of your ceilings is critical in knowing how much paint is needed as well as what supplies you will need.
Knowing the measurements will save you from buying too much paint or having to make an extra trip because you bought the wrong amount. When measuring for painting projects, accuracy is key, so measure twice and cut once! Keep your measurements as a note on your phone for easy access.
Remove Items From Walls
Taking items off your walls before painting may seem like common sense but it’s an important step to take. Making this a routine for all home projects will save you from a lot of hassle in the future. So before you get started, grab a cloth and start removing everything from the walls.
If it’s not possible to remove everything from your walls then at least take down any picture frames or decorations that can be easily removed. Also remember to take off light coverings such as lamps, ceiling fans, etc. You are wanting the most even and smooth base possible for your paint job to look great!
Repair Holes and Bumps
If you have any major holes or bumps on your walls, the best course of action is to sand them down. Be careful not to damage your wall but instead deep enough to make it even with the rest of the room. If there are any holes or bumps then removing wallpaper remnants will be a better option for you. Use a paint scraper to scrape off any excess paper before you sand down the walls.
After the walls are completely flat, use spackle (or wall filler) to cover up any holes or major bumps. Just make sure it’s dry before your paint over it!
Removing Furniture
If possible, removing your furniture from the room is always better. This includes any cabinets or dressers as well because it will give you full access to the room which could come in handy if there are any dents or holes that need to be filled. You also want to move them out of the way in case any paint spills accidentally happen while painting.
If you can’t remove the furniture, make sure to put down a drop cloth or newspaper to prevent any paint from accidentally spilling. If you don’t have a drop cloth and newspaper is all you have on hand, it will be better than nothing!

Painter’s Tape Is Your Friend
The final step is to apply painter’s tape around windows, doorknobs, sockets, and anywhere else you don’t want the paint to accidentally get on.
The best method for this is to first apply one long piece of painter’s tape, and then to go back over the same strip again.
This will cover up any gaps that may have existed between strips by using two strips instead of just one. Try to use the thinnest painter’s tape you can find because it will provide a cleaner-looking edge once you are done painting.
Also when it comes to painter’s tape, the more expensive brands do tend to work better. They will lay flat and remove easily.
Supplies Needed For Painting Prep Work
Now that you know all the necessary steps to preparing a room for painting, here is a list of all the possible supplies you may need! Feel free to adjust the list as you need. If you need help deciding what kind of paint and which brushes to use, ask a professional at your local hardware store for help.
It’s important to get all of your supplies together before you start painting because if you run out mid-project, it will delay the project and be more time-consuming!
- Tape: use thin painters tape and take note of how much you’ll need
- Paint Scraper: for removing wallpaper remnants
- Spackle/Wall Filler: for filling in holes or dents
- Drop Cloth/Newspaper: to protect the floor from stains and damage
- Tarp, Fabric Dropcloth, Plastic Sheeting, etc.: for covering your furniture if possible
- 4ft Level: Essential for making sure your walls and ceiling are straight before painting. Can also be used as a surface to cut on or measure with.
- Assorted Paint Brushes: Start with larger brushes and then move onto smaller ones that will provide more details
- Sand Paper/Sanding Sponge: You can never have enough sandpaper when doing a big painting project. Sandpaper makes a great surface to cut on, and sponges are good for getting into corners.
- Paint pan or cup for mixing paint: This will be used to transfer the paint from the paint bucket to the brushes.
- Paint Rollers: This includes both large and small paint rollers for your convenience.
- A lint-free cloth or paper towels: These will be used for cleaning up any paint spills on the floor or furniture.
- Screwdriver: if removing light coverings
- Measuring Tape: to measure your room
- Level: to check the walls are even
Other Tips To Remember Before Painting
While DIY painting is a relatively straightforward project, there are several tips to remember.
Ventilation is Key
Always make sure you have plenty of efficient ventilation before starting any project. A simple fan running in the room will do its part to keep air flowing and prevent paint chemicals and fumes from accidentally getting into your lungs. You don’t want that!
Avoid Large Amounts Of Paint
Painting in big sections is always better than painting in smaller sections. Because you want to work on a larger section at a time, it will prevent the paint from drying before you get to use it and also give you more time to spread out your strokes. This step should be taken especially when working
Don’t Paint When It’s Hot
The best times to start painting are either early morning or late at night. This will help to prevent any unnecessary heat from getting trapped into the room as well as not having to worry about people bumping into your furniture or other paint obstacles.
Be Careful With Paint Spills
If you do happen to accidentally spill some paint, make sure to clean it up asap! Be careful not to spread the paint further and only use household cleaners such as 409 or Windex instead of other harsher chemicals.
Avoid Spray Paint
Unless you are a professional with years of experience, spray paints can be difficult to use and deal with. It will provide you with the best results if you choose to paint by hand instead of with brushes or rollers.
The Extra Effort Will Pay Off
Painting can be a difficult and time-consuming process, but the results will pay off in the end. The best thing you can do is to take your time and prep your room accordingly so that it comes out looking good and lasts for years! If you do these steps with extra effort and put in the time and energy, your finished product will be all the more satisfying.
If, after learning about the prep work necessary for efficient painting, you are slightly overwhelmed, don’t hesitate to contact a local painting company!

