Textured Paint For Walls
My guest bathroom is being remodeled, and when it came time to choose the look I wanted for the walls, I had no idea how many decisions I’d have to make. Not only do I get to choose the paint colors and finishes, but I also get to choose what texture I want the walls to have. I wanted to know what all of my options are, so I did some research to find out what those are.
So, what are the nine different types of textured paints for walls? They are orange peel, knockdown, smooth, popcorn, hawk and trowel, skip trowel, slap brush, silica sand, and roll-on textures. Most of these will need to be applied before painting, while others are a part of the painting process.
Each of these textures creates a specific look and can serve unique purposes.
The Types of Textured Paint for Walls
1. Orange Peel
This texture has a subtle, yet slightly bumpy finish and is perfect for hiding minor imperfections in your walls. It’s also one of the more affordable textures to apply. The orange peel texture is made out of thinned drywall mud and applied with a paint roller or sprayer.

2. Knockdown
This texture is a combination of bumpy and small, flat areas created by applying drywall mud to your walls and then using a brush or roller to “knock down” the bumps, creating a smooth finish that still has texture.

3. Smooth
If you’re looking for a sleek, modern look, then smooth walls are the way to go. This texture creates, as its name implies, a smooth and flat wall, and it can be achieved by either rolling on a very thin coat of paint or by using a spray gun.
4. Popcorn
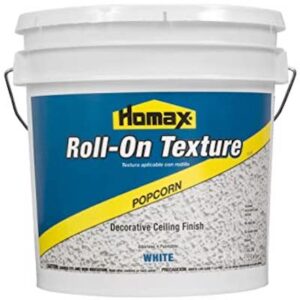
This texture is perfect if you want to add some extra character to your walls. It can be applied in a variety of ways, but the most popular is to use a hopper gun to add small bumps all over the surface of the wall or ceiling.
5. Hawk and Trowel
This texture uses plaster to create a flat, slightly mottled finish all over the walls. The result is a very rustic look that invokes the feeling of an Italian villa.
6. Skip Trowel
If you’re not interested in having a mottled, patchy look to your walls, then skip trowel is the texture for you. It looks similar to the knockdown texture, but the drywall mud bumps are spread farther apart, creating a smoother and more consistent finish while still adding texture.
7. Slap Brush
This texture is also known as “stippling” and is created by slapping drywall mud onto the walls with a brush. This will create small ridges that give your walls a very bumpy finish.
8. Silica Sand
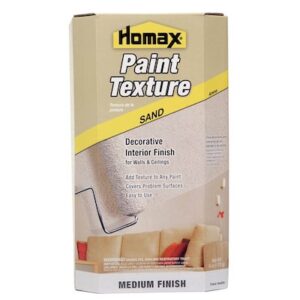
This texture is created by adding sand to your paint before applying it to your walls. It gives a rough, stone-like appearance and is perfect for creating a vintage look.
9. Roll-on textures
There are a variety of roll-on textures that can be applied, including stucco, brick, and slate. Usually, it is a layer applied before the paint and uses a comb, roller, or brush to create prominent patterns.
As you can see, there are a lot of different textures that you can choose from when painting your walls. Which one you choose will depend on your style and the look you’re going for.
How To Choose a Wall Texture
When choosing a wall texture for your home, start by asking yourself what your overall goal for your wall paint texture is. This is important because if you’re trying to create a specific look or feel with your walls, you may want to choose something bolder than you would if you’re just trying to find a neutral and timeless option.
In addition, if there is an imperfection you’re trying to hide or if you’re trying to match another wall’s existing texture, this may also narrow down your options.
Once you know what your goal is, ask your local contractor, paint, or hardware store for samples of the different textures you’re considering. If you can, look at samples from the company that will be applying them or that you’re purchasing the materials from so that you get as accurate of a portrayal of how they’ll look on your walls as possible.
It also may be a good idea to ask a designer or a friend whose taste you trust for recommendations. Wall textures, like everything else, go through trends, and choosing the wrong one can make your home look dated. You can even ask your contractor what they’ve been using the most recently.
The last elements to consider are your budget and the texture’s longevity. Some textures, like popcorn or hawk and trowel, require more materials and may be a bit more expensive than others. Highly textured walls can also be more difficult to repaint and smoother walls also tend to show scuffs and imperfections more easily, so consider those potential future costs as well.
Remember that you only choose your wall texture once, so make sure that you’ll love it for years to come. In addition, if you think you might ever sell your home, you should also consider ensuring that you don’t choose a texture that is so unusual that it will discourage future buyers.
How To Apply Different Textures For Walls
Once you’ve decided which texture is right for your space, then you can either hire a professional painter or do it yourself. If you choose the latter, follow these general steps to apply the texture (remember to adjust for the particular texture you’ve chosen):
1. If there is a specific paint you’ll be adding as part of the texture, such as silica sand or stucco, then choose that and prepare it.
2. Mix your paint or finish according to the manufacturer’s instructions. Make sure to let it sit for a few minutes so that any bubbles will settle before applying it to your walls.
3. Load up your hopper gun or roller brush and begin applying it to your walls in small sections using smooth strokes and even pressure throughout the process.
4. Continue until all of your desired wall space has been covered and allow it to dry completely overnight before painting over it.
If you choose to have a professional apply your texture, then be sure to discuss how you want your walls to look with them before they begin and ask for a sample of their work so you can be sure you’re going to get what you’re expecting.
While the application process may seem daunting at first, it’s a lot simpler than it seems and with the right tools and instructions, you can do it yourself without any problems.
Why You Should Texture Your Walls
Now that you know how to choose and apply different textures, the question remains: Why should you apply wall paint texture in the first place?
Some common reasons include hiding imperfections or repairing the damage. If you have somewhat uneven walls or flaws in your drywall, applying a texture can give the illusion of perfectly flat surfaces. It’s also great for hiding features like vents or corners that are difficult to paint evenly.
Adding texture to your walls also makes it easier to mask smudges, fingerprints, and dings from pets, children, or yourself. It also adds warmth and character to your space and can help you achieve a particular look or vibe you want your home to have.
Whatever the reason, remember that you typically only texture a wall once, so take your time making sure you choose the perfect one for you.
Downsides of Texture Paint
There are a few potential downsides to wall textures. First, some require a huge amount of materials and can be costly. Second, some of them can be difficult and expensive to repair or repaint if you change your mind down the road. Silica sand, for example, can be incredibly challenging to remove completely and may require special equipment.
Third, they’re not all for everyone. If you’re torn between a bold texture or a more subtle one, you may want to go with the less intense look so that your home doesn’t become dated or more difficult to sell down the road. While a smooth or more subtle texture such as knockdown or orange peel won’t necessarily make a statement, their understatedness makes them more universal and timeless than popcorn or slap brush.
Finally, remember that a DIY texture paint job may not be as polished and even as a professional one would be. If you’re going for a unique texture, it’s best to leave it to the pros.
What is wall texture made out of? Wall textures can be made from a variety of materials, but the most common are paint, plaster, or drywall joint compounds (commonly called “mud”). Some also include elements such as sand or fiberglass mixed in with paint.
How do you remove wall texture paint? The best way to remove wall texture paint is to scrape it off with a putty knife. If the texture has been painted over, simply use a paint scraper. Just remember, removing drywall mud can be difficult and potentially dangerous if you don’t wear protective gear such as gloves and eye protection.

