The Correct Way To Clean A Coffee Maker
When is the last time you cleaned your coffee pot? If you haven’t cleaned your coffee pot in a while, or if you don’t even know how to clean one, now is the time to learn. Not only does buildup render your coffee unpleasant, but it also harms your machine. Know that cleaning your coffee maker the incorrect way can make your coffee taste worse, even if you use the best cold brew coffee makers or experiment with different varieties of coffee.
So, how do you clean your coffee pot correctly? The correct way to clean a coffee pot is to clean it daily to avoid residue buildup. You can use a variety of methods to clean your coffee pot, but the most important thing is to be consistent. Some cleaning methods include water and vinegar, mild dish soap, or even baking soda with a non-abrasive sponge.
Keeping your coffee maker clean is critical to keeping it functioning properly (and making your mornings pleasant). Oily residue, hard-water deposits, and other impurities accumulate over time, obstructing the inner workings of your machine and affecting the taste of your coffee.
Whether you have a standard percolator, an automatic drip coffeemaker, or a single cup “pod” system, they all have one thing in common: the machine is a moist environment where mold and germs may grow, regardless of how pricey your coffee beans are.
Why Should You Clean Your Coffee Pot?
 Coffee pots are notorious for breeding mold, which begins to grow in them every morning and spoils your coffee.
The reservoir of the coffee maker was the fifth germiest thing in people’s homes, after predictably filthy items like sponges and pet food bowls.
Even if your coffee machine doesn’t appear to have been growing anything for decades, it’s most likely due for a thorough cleaning.
If you use your coffee maker daily, it should get cleaned once every month.
Coffee grinds accumulate residue in the brew basket and contaminants can thrive in the brewing components if not cleaned regularly.
Steps for Cleaning Your Coffee Pot
Here are some basic steps you should follow to correctly clean your coffee pot.
Gather Tools and Materials
A commercial cleaning solution, or a DIY cleaner made with white vinegar and water, may be used to clean a coffee maker. You’ll also need mild dish soap if required, and baking soda, depending on the condition of your coffee maker.
When it comes to cleaning removable parts of the machine, a non-abrasive dish sponge or scrubber is ideal. Steel wool or anything else that might scratch the carafe or components of the coffee maker should not be used.
Wipe the coffee pot with paper towels, kitchen towels, or microfiber cleaning cloths to dry it. If you’re cleaning a French press, use a bottle brush and a rubber spatula to make things easier.
Daily Cleaning
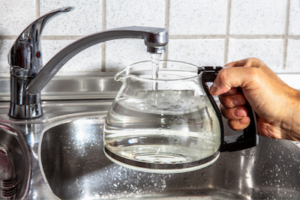
 Cleaning a coffee maker daily does not have to be time-consuming. If your coffee maker has removable components, such as the carafe, brew basket, or water tank, remove them and clean them.
Rinse the equipment with water, then drain it.
Wash the parts in a basin of warm water and mild dish soap, then rinse them thoroughly with a sponge. Rubber gloves may be used to protect your hands while washing.
Deep Cleaning
Depending on how often you use it, most manufacturers recommend cleaning your coffee maker every one or two months. Reassemble and connect the machine following the steps above, then clean the removable components.
Fill the coffee maker’s water tank with a combination of half and half water and white vinegar. Cleaning a coffee machine with vinegar is an excellent all-natural option. This solution will decalcify the device’s interior as well as add acidity to the heated water to disinfect it.
- Allow the coffee maker to brew halfway through its cycle.
- Allow the mixture to steep for 30 to 45 minutes before turning on the coffee maker and allowing the cycle to finish.
- Discard the cleaning solution and fill the water tank with clean water.
- Allow the water to run through the system once the brew cycle is completed. Refill the tank and repeat.
- When the last cycle is finished, drain one cup of water and discard the rest.
- Add a spoonful of baking soda to the cup. If the soda fizzes, there are still traces of vinegar in the water. Repeat the rinsing brew cycle one more time and retest the water after it has finished.
If you are having a difficult time removing debris from the carafe, you can try swirling a little rice mixed with warm, soapy water. This should help to loosen any gunk with the gentle assistance of a sponge.
Other Ways to Deep Clean Without Vinegar
If you don’t have vinegar on hand but still need to know how to clean a drip coffee maker, there are a few other great options available.
- Make a lemon water solution. Go for a solution of 20 percent lemon and 80 percent water, which is also effective against limescale. Use the coffee maker in the same manner as you would the vinegar solution, but be sure to run it through plain water after.
- Try using baking soda, which is the household must-have for cleaning. To eliminate oils and stains, we recommend combining a quarter cup of baking soda with a liter of water.
- Try using a commercial cleaning product. There are a variety of commercial cleaning products you can purchase. These cleaners come in liquid, tablet, and powder options, so you can choose whatever your most comfortable option is.
Cleaning a French Press Coffee Maker
A manual French press is simpler to use, but it may still have some difficulties when it comes to cleaning a coffee maker.
- To scrape the spent coffee grounds out of the French press carafe, use a rubber spatula.
- Fill the carafe with water and swirl to loosen the grounds, then pour out into a small sieve to avoid having the grounds fall down the drain.
- Place the damp coffee grounds into a container, seal the top tightly, and either discard them or save them for composting.
- Fill the carafe halfway with warm water. Add a teaspoon of mild dish soap to the mix.
- Place the plunger lid in place and press down on the top of the carafe three or four times to move the plunger up and down quickly.
- Remove the plunger and rinse the carafe thoroughly.
- Allow to air dry on paper towels or a clean kitchen towel.
- Reassemble the coffee maker.
When it comes to thorough cleaning, remove and disassemble the plunger’s components, including filter screens and disks. All of the parts should be washed in warm water with mild dish soap. If necessary, the screens may need to be scrubbed lightly to remove old grounds.
Allow to air dry, then drain and clean all of the components. Reassemble the French press, replacing all of the parts. Make sure that you don’t wash used coffee grinds down the drain in your kitchen; doing so may cause blockage.
Cleaning Commercial Coffee Pots
Cleaning a commercial coffee maker at your local business is a daunting task, but with the proper knowledge and equipment, it can be done relatively easily. The first step is to unplug the machine and allow it to cool completely.
- Remove any loose build-up from the exterior of the machine with a damp cloth. If there is significant build-up, it may be necessary to use an abrasive cleaner, but never apply anything corrosive or toxic.
- Flush the machine’s water tank with warm water and mild dish soap. Then, rinse with clear water. Empty the water tank and clean out any residual coffee or debris that might be inside.
- Wipe the exterior of the machine down with a wet, soapy cloth.
- Drain the condensation tray and wash it with warm water and mild dish soap. Then, rinse it thoroughly. You don’t want to attract more bacteria by leaving any residue behind on this component.
- Once you’ve cleaned all of the exterior components, flush out the inside of the machine with clean water. If there is any sediment or build-up inside, use a small brush to scrub it away.
- Reassemble the machine and plug it in. Allow it to come up to temperature before brewing your next pot of coffee. If you have a particularly difficult time cleaning your commercial coffee maker, you may want to consider hiring a professional service to do the job for you.
How to Prevent Buildup
 Here are a few additional tips to help you prevent unhealthy buildup on your coffee maker. On your coffee maker, hard water leaves a film behind.
The quality of your coffee and the longevity of your espresso machine are both affected by water hardness.
If your coffee pot is used frequently, consider using filtered water to brew your coffee. After brewing, leave the top open for extra air circulation; to keep it dry and undesirable to germs.
You may also use a paper towel or a kitchen towel for this.
If you don’t have time to clean the coffee machine right away, try to empty and rinse the brew basket after each brew cycle. Also, if you see the plume of steam rise after turning your machine on, it means that there is some unclean matter inside.
The type of coffee beans you use may also have an impact on how clean your machine stays. It’s all about the amount of residual oil. Dark-roasted coffee beans tend to be a bit more oily because they’re roasted for a longer period of time. Medium-roasted coffee beans are a quality option that are not too oily and always brew a smooth and balanced cup of coffee.
Just by simply using a few common ingredients and supplies that you have in your home, you can easily keep your coffee maker safe and presentable!
